flutter_inappwebview是什么?它是一个Flutter插件,让你可以把WebView小部件加入到Flutter应用中,从而使用headless WebView或In-App Browser。与其他WebView插件相比,它的功能非常丰富:有很多事件、方法和选项可以用来控制WebView。此外,flutter_inappwebview的每个特性几乎都有文档记录。
本文最初发布于Flutter社区,经原作者授权由InfoQ中文站翻译并分享。
Flutter InAppWebView
flutter_inappwebview 是什么?它是一个Flutter插件,让你可以把 WebView小部件 加入到Flutter应用中,从而使用 headless WebView 或 In-App Browser 。
那么, webview_flutter (官方Flutter插件)和 flutter_webview_plugin 有什么区别呢?
与其他WebView插件相比,它的功能 非常丰富 :有很多 事件 、 方法 和 选项 可以用来控制WebView。此外,前者没有提供很好的API文档,或者至少是文档不完整。相比之下, flutter_inappwebview 的每个特性几乎都有文档记录(可 在pub.dev上查阅API参考)。
在本文中,我将展示人们在 官方flutter_inappwebview 存储库(问题部分)和StackOverflow 上问到的 InAppWebView小部件的主要类和一些示例。
主要类概览
该插件主要提供了以下类:
- InAppWebView :一个 Flutter 小部件,用于添加整合到 Flutter 部件树的内联原生 WebView。
- ContextMenu :该类表示 WebView 的快捷菜单。
- HeadlessInAppWebView :该类表示处于 headless 模式的 WebView。它可以用来在后台运行 WebView,而无需将
InAppWebView附加到部件树中。 - InAppBrowser :使用原生 WebView 的 In-App Browser。
- ChromeSafariBrowser :使用 Chrome Custom Tabs (Android)和 SFSafariViewController (iOS)的 In-App Browser。
- InAppLocalhostServer :该类让你可以创建一个简单的服务器:
http://localhost:[port]/. ,默认port为8080。 - CookieManager :这个类实现了一个单例对象(共享实例),管理 WebView 实例使用的 cookie。
- HttpAuthCredentialDatabase :该类实现一个管理共享 HTTP 身份验证凭据缓存的单例对象(共享实例)。
- WebStorageManager :该类生成一个管理 Web 存储(供 WebView 实例使用)的单例对象(共享实例)。
在本文中,我将重点展示 InAppWebView 小部件,这是使用 / 请求最多的小部件。
添加 InAppWebView 小部件
在应用中添加 InAppWebView 小部件非常简单。它只是一个和任何其他小部件一样的 Flutter 小部件: InAppWebView(initialUrl: 'https://github.com/flutter') 。
注意 :要在 iOS 上使用它,你需要在应用的 Info.plist 文件中添加一个布尔型属性来选择嵌入的视图预览,键为 io.flutter.embedded_views_preview ,值为 YES 。
这个小部件有一组初始化属性,可以用于初始化 WebView:
- initialUrl :初始加载的 URL。
- initialOptions :将会使用的初始 WebView 选项。
- gestureRecognizers :指定 WebView 应该使用的划屏手势。
- initialData :初始加载的 InAppWebViewInitialData,如 HTTP 字符串。
- initialFile :初始加载的资产文件(请查看“ 加载 assets 文件夹下的文件”一节)。
- initialHeaders :初始使用的头信息。
- contextMenu :包含自定义选项的快捷菜单。
WebView 可用选项的列表很长,例如,你可以使用 javascriptEnabled 选项启用 / 禁用 JavaScript,或者使用 cacheEnabled 选项启用 / 禁用缓存。所有选项的完整列表请查看 这里。
使用InAppWebViewController 控制WebView
要控制WebView,则可以使用 InAppWebViewController 类。当 WebView 准备就绪时, onWebViewCreated 回调会返回该控制器。
通过它,你可以控制 WebView 或者访问它的属性,比如使用 getUrl 方法访问当前的 URL。还有其他方法,比如 loadUrl 加载一个新的 URL, postUrl 使用 POST 方法加载包含自定义数据的指定 URL, evaluateJavascript对传入 WebView 的 JavaScript 代码求值并取得求值结果, takeScreenshot 获取 WebView 视窗的截图(PNG 格式), getCertificate 获取顶级主页的 SSL 证书 或者在没有证书时返回 null 。你可以使用的所有方法的完整列表非常长,感兴趣的话,请点击 这里。
InAppWebView 事件
小部件 InAppWebView 提供了各种事件。下面列出了其中的一部分:
- onLoadStart :当 WebView 开始加载某个 URL 时触发该事件;
- onLoadStop :当 WebView 完成一个 URL 的加载时触发该事件;
- onLoadHttpError :当 WebView 的主页收到 HTTP 错误时触发该事件;
- onConsoleMessage :当 WebView 收到一条 JavaScript 控制台消息(如
console.log、console.error)时触发该事件; - shouldOverrideUrlLoading :当一个 URL 将要在当前的 WebView 中加载时为宿主应用提供获取控制权的机会;
- onDownloadStart :当 WebView 识别到一个可下载的文件时触发该事件;
- onReceivedHttpAuthRequest :当 WebView 收到一个 HTTP 身份验证请求时触发该事件;默认行为是取消请求;
- onReceivedServerTrustAuthRequest :当 WebView 需要执行服务器信任认证(证书验证)时触发该事件;
- onPrint :当在 JavaScript 端调用
window.print()时触发该事件; - onCreateWindow :当
InAppWebView请求宿主应用程序创建一个新窗口时触发该事件,例如当尝试用target="_blank"打开链接,或者当 JavaScript 端调用window.open()时。
还有 许多许多 !你可以查看 API 参考来了解更多细节。至于 WebView 的选项和方法,完整的清单非常长,感兴趣的话,请点击 这里。
InAppWebView 简单示例
下面是一个简单的示例,展示了一个 InAppWebView 小部件、它的当前 URL 和 3 个按钮:一个返回,一个向前,另一个重新加载当前页面。

InAppWebView 示例
完整代码如下:
import 'dart:async';
import 'package:flutter/material.dart';
import 'package:flutter_inappwebview/flutter_inappwebview.dart';
Future main() async {
  WidgetsFlutterBinding.ensureInitialized();
  runApp(new MyApp());
}
class MyApp extends StatefulWidget {
  @override
  _MyAppState createState() => new _MyAppState();
}
class _MyAppState extends State<MyApp> {
  InAppWebViewController _webViewController;
  String url = "";
  double progress = 0;
  @override
  Widget build(BuildContext context) {
    return MaterialApp(
      home: Scaffold(
        appBar: AppBar(
          title: const Text('InAppWebView Example'),
        ),
        body: Container(
            child: Column(children: <Widget>[
              Container(
                padding: EdgeInsets.all(20.0),
                child: Text(
                    "CURRENT URL\n${(url.length > 50) ? url.substring(0, 50) + "..." : url}"),
              ),
              Container(
                  padding: EdgeInsets.all(10.0),
                  child: progress < 1.0
                      ? LinearProgressIndicator(value: progress)
                      : Container()),
              Expanded(
                child: Container(
                  margin: const EdgeInsets.all(10.0),
                  decoration:
                  BoxDecoration(border: Border.all(color: Colors.blueAccent)),
                  child: InAppWebView(
                    initialUrl: "https://flutter.dev/",
                    initialOptions: InAppWebViewGroupOptions(
                        crossPlatform: InAppWebViewOptions(
                          debuggingEnabled: true,
                        )
                    ),
                    onWebViewCreated: (InAppWebViewController controller) {
                      _webViewController = controller;
                    },
                    onLoadStart: (InAppWebViewController controller, String url) {
                      setState(() {
                        this.url = url;
                      });
                    },
                    onLoadStop: (InAppWebViewController controller, String url) async {
                      setState(() {
                        this.url = url;
                      });
                    },
                    onProgressChanged: (InAppWebViewController controller, int progress) {
                      setState(() {
                        this.progress = progress / 100;
                      });
                    },
                  ),
                ),
              ),
              ButtonBar(
                alignment: MainAxisAlignment.center,
                children: <Widget>[
                  RaisedButton(
                    child: Icon(Icons.arrow_back),
                    onPressed: () {
                      if (_webViewController != null) {
                        _webViewController.goBack();
                      }
                    },
                  ),
                  RaisedButton(
                    child: Icon(Icons.arrow_forward),
                    onPressed: () {
                      if (_webViewController != null) {
                        _webViewController.goForward();
                      }
                    },
                  ),
                  RaisedButton(
                    child: Icon(Icons.refresh),
                    onPressed: () {
                      if (_webViewController != null) {
                        _webViewController.reload();
                      }
                    },
                  ),
                ],
              ),
            ])),
      ),
    );
  }
}
JavaScript 处理程序(通道)
你可以与 JavaScript 端通信,反之亦然。要添加一个 JavaScript 处理程序,可以使用 _webViewController.addJavaScriptHandler 方法,其中定义了 JavaScript 端调用时会激活的 handlerName和 callback 。 callback 可以返回要在 JavaScript 端发送的数据。
反之,在 JavaScript 端,要执行回调处理程序并向 Flutter 发送数据,需要使用 window.flutter_inappwebview.callHandler(handlerName ,…args) 方法,其中 handlerName 是一个字符串,表示调用的处理程序的名称, args 是可以发送到 Flutter 端的可选参数。
为了正确地调用 window.flutter_inappwebview.callHandler(handlerName <String>, ...args) ,你需要等待并监听 JavaScript 事件 flutterInAppWebViewPlatformReady 。平台(Android 或 iOS)一准备好处理 callHandler 方法,就会分派这个事件。
下面是个例子:
import 'dart:async';
import 'dart:collection';
import 'dart:convert';
import 'dart:io';
import 'dart:typed_data';
import 'package:flutter/material.dart';
import 'package:flutter_inappwebview/flutter_inappwebview.dart';
import 'package:url_launcher/url_launcher.dart';

Future main() async {
  WidgetsFlutterBinding.ensureInitialized();

  if (Platform.isAndroid) {
    await AndroidInAppWebViewController.setWebContentsDebuggingEnabled(true);
  }

  runApp(new MyApp());
}

class MyApp extends StatefulWidget {
  @override
  _MyAppState createState() => new _MyAppState();
}

class _MyAppState extends State<MyApp> {

  final GlobalKey webViewKey = GlobalKey();

  InAppWebViewController? webViewController;
  InAppWebViewGroupOptions options = InAppWebViewGroupOptions(
      crossPlatform: InAppWebViewOptions(
        useShouldOverrideUrlLoading: true,
        mediaPlaybackRequiresUserGesture: false,
      ),
      android: AndroidInAppWebViewOptions(
        useHybridComposition: true,
      ),
      ios: IOSInAppWebViewOptions(
        allowsInlineMediaPlayback: true,
      ));

  late PullToRefreshController pullToRefreshController;
  String url = "";
  double progress = 0;
  final urlController = TextEditingController();

  @override
  void initState() {
    super.initState();

    pullToRefreshController = PullToRefreshController(
      options: PullToRefreshOptions(
        color: Colors.blue,
      ),
      onRefresh: () async {
        if (Platform.isAndroid) {
          webViewController?.reload();
        } else if (Platform.isIOS) {
          webViewController?.loadUrl(
              urlRequest: URLRequest(url: await webViewController?.getUrl()));
        }
      },
    );
  }

  @override
  void dispose() {
    super.dispose();
  }

  @override
  Widget build(BuildContext context) {
    return MaterialApp(
      home: Scaffold(
          appBar: AppBar(title: Text("Official InAppWebView website")),
          body: SafeArea(
              child: Column(children: <Widget>[
                TextField(
                  decoration: InputDecoration(
                      prefixIcon: Icon(Icons.search)
                  ),
                  controller: urlController,
                  keyboardType: TextInputType.url,
                  onSubmitted: (value) {
                    var url = Uri.parse(value);
                    if (url.scheme.isEmpty) {
                      url = Uri.parse("https://www.google.com/search?q=" + value);
                    }
                    webViewController?.loadUrl(
                        urlRequest: URLRequest(url: url));
                  },
                ),
                Expanded(
                  child: Stack(
                    children: [
                      InAppWebView(
                        key: webViewKey,
                        initialUrlRequest:
                        URLRequest(url: Uri.parse("https://inappwebview.dev/")),
                        initialOptions: options,
                        pullToRefreshController: pullToRefreshController,
                        onWebViewCreated: (controller) {
                          webViewController = controller;
                        },
                        onLoadStart: (controller, url) {
                          setState(() {
                            this.url = url.toString();
                            urlController.text = this.url;
                          });
                        },
                        androidOnPermissionRequest: (controller, origin, resources) async {
                          return PermissionRequestResponse(
                              resources: resources,
                              action: PermissionRequestResponseAction.GRANT);
                        },
                        shouldOverrideUrlLoading: (controller, navigationAction) async {
                          var uri = navigationAction.request.url!;

                          if (![ "http", "https", "file", "chrome",
                            "data", "javascript", "about"].contains(uri.scheme)) {
                            if (await canLaunch(url)) {
                              // Launch the App
                              await launch(
                                url,
                              );
                              // and cancel the request
                              return NavigationActionPolicy.CANCEL;
                            }
                          }

                          return NavigationActionPolicy.ALLOW;
                        },
                        onLoadStop: (controller, url) async {
                          pullToRefreshController.endRefreshing();
                          setState(() {
                            this.url = url.toString();
                            urlController.text = this.url;
                          });
                        },
                        onLoadError: (controller, url, code, message) {
                          pullToRefreshController.endRefreshing();
                        },
                        onProgressChanged: (controller, progress) {
                          if (progress == 100) {
                            pullToRefreshController.endRefreshing();
                          }
                          setState(() {
                            this.progress = progress / 100;
                            urlController.text = this.url;
                          });
                        },
                        onUpdateVisitedHistory: (controller, url, androidIsReload) {
                          setState(() {
                            this.url = url.toString();
                            urlController.text = this.url;
                          });
                        },
                        onConsoleMessage: (controller, consoleMessage) {
                          print(consoleMessage);
                        },
                      ),
                      progress < 1.0
                          ? LinearProgressIndicator(value: progress)
                          : Container(),
                    ],
                  ),
                ),
                ButtonBar(
                  alignment: MainAxisAlignment.center,
                  children: <Widget>[
                    ElevatedButton(
                      child: Icon(Icons.arrow_back),
                      onPressed: () {
                        webViewController?.goBack();
                      },
                    ),
                    ElevatedButton(
                      child: Icon(Icons.arrow_forward),
                      onPressed: () {
                        webViewController?.goForward();
                      },
                    ),
                    ElevatedButton(
                      child: Icon(Icons.refresh),
                      onPressed: () {
                        webViewController?.reload();
                      },
                    ),
                  ],
                ),
              ]))),
    );
  }
}
InAppWebView 中的 WebRTC
目前, WebRTC 只在 Android 上获得了支持,因为,很遗憾,iOS 上的 WKWebView 并没有实现所有的 WebRTC API(你可以跟踪下这个问题: #200 )。
我将使用 https://appr.tc/ 展示一个示例,以测试 WebRTC 的特性。这是一个基于 WebRTC(https://github.com/webrtc/apprtc )的视频聊天演示应用。
要请求相机和麦克风的权限,可以使用 permission_handler 插件。另外,你需要将 WebView 选项 mediaPlaybackRequiresUserGesture 设置为 false ,以便自动播放 HTML5 音频和视频。
此外,在 Android 上,你需要实现 androidOnPermissionRequest 事件(它是 Android 特有的事件),当 WebView 请求访问特定资源的权限时会触发该事件(这是 Android 原生的 WebChromeClient.onPermissionRequest 事件)。在本例中,该事件用于为 WebRTC API 授予权限。另外,你需要在 AndroidManifest.xml 中添加这些权限:
<uses-permission android:name="android.permission.INTERNET"/>
<uses-permission android:name="android.permission.CAMERA" />
<uses-permission android:name="android.permission.RECORD_AUDIO" />
<uses-permission android:name="android.permission.MODIFY_AUDIO_SETTINGS" />
<uses-permission android:name="android.permission.VIDEO_CAPTURE" />
<uses-permission android:name="android.permission.AUDIO_CAPTURE" />
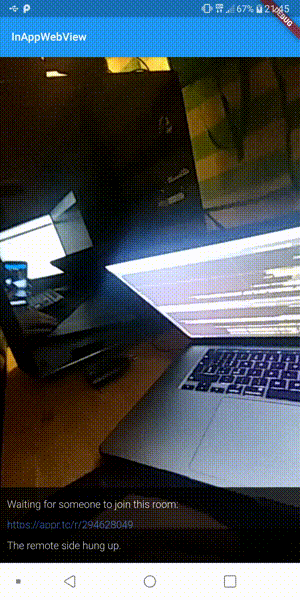
WebRTC 示例
下面是完整的代码:
import 'dart:async';
import 'package:flutter/material.dart';
import 'package:flutter_inappwebview/flutter_inappwebview.dart';
import 'package:permission_handler/permission_handler.dart';
Future main() async {
  WidgetsFlutterBinding.ensureInitialized();
  await Permission.camera.request();
  await Permission.microphone.request();
  runApp(MyApp());
}
class MyApp extends StatefulWidget {
  @override
  _MyAppState createState() => new _MyAppState();
}
class _MyAppState extends State<MyApp> {
  @override
  Widget build(BuildContext context) {
    return MaterialApp(
        home: InAppWebViewPage()
    );
  }
}
class InAppWebViewPage extends StatefulWidget {
  @override
  _InAppWebViewPageState createState() => new _InAppWebViewPageState();
}
class _InAppWebViewPageState extends State<InAppWebViewPage> {
  InAppWebViewController _webViewController;
  @override
  Widget build(BuildContext context) {
    return Scaffold(
        appBar: AppBar(
            title: Text("InAppWebView")
        ),
        body: Container(
            child: Column(children: <Widget>[
              Expanded(
                child: Container(
                  child: InAppWebView(
                      initialUrl: "https://appr.tc/r/704328056",
                      initialOptions: InAppWebViewGroupOptions(
                        crossPlatform: InAppWebViewOptions(
                          mediaPlaybackRequiresUserGesture: false,
                          debuggingEnabled: true,
                        ),
                      ),
                      onWebViewCreated: (InAppWebViewController controller) {
                        _webViewController = controller;
                      },
                      androidOnPermissionRequest: (InAppWebViewController controller, String origin, List<String> resources) async {
                        return PermissionRequestResponse(resources: resources, action: PermissionRequestResponseAction.GRANT);
                      }
                  ),
                ),
              ),
            ]))
    );
  }
}
如何在 InAppWebView 中支持文件下载?
InAppWebView 可以识别 Android 和 iOS 平台上的可下载文件。要识别可下载的文件,你需要设置 useonDownloadStart: true 选项,然后监听 onDownloadStart 事件。在 Android 上,你需要在 AndroidManifest.xml 文件中添加写权限:
<uses-permission android:name="android.permission.WRITE_EXTERNAL_STORAGE" />
然后需要使用 permission_handler 插件请求权限。而要高效地下载文件,可以使用 flutter_downloader 插件。下面是使用 http://ovh.net/files/ (特别是 http://ovh.net/files/1Mio.dat )测试下载的完整示例:
import 'dart:async';
import 'package:flutter/material.dart';
import 'package:flutter_inappwebview/flutter_inappwebview.dart';
import 'package:permission_handler/permission_handler.dart';
Future main() async {
  WidgetsFlutterBinding.ensureInitialized();
  await Permission.camera.request();
  await Permission.microphone.request();
  runApp(MyApp());
}
class MyApp extends StatefulWidget {
  @override
  _MyAppState createState() => new _MyAppState();
}
class _MyAppState extends State<MyApp> {
  @override
  Widget build(BuildContext context) {
    return MaterialApp(
        home: InAppWebViewPage()
    );
  }
}
class InAppWebViewPage extends StatefulWidget {
  @override
  _InAppWebViewPageState createState() => new _InAppWebViewPageState();
}
class _InAppWebViewPageState extends State<InAppWebViewPage> {
  InAppWebViewController _webViewController;
  @override
  Widget build(BuildContext context) {
    return Scaffold(
        appBar: AppBar(
            title: Text("InAppWebView")
        ),
        body: Container(
            child: Column(children: <Widget>[
              Expanded(
                child: Container(
                  child: InAppWebView(
                      initialUrl: "https://appr.tc/r/704328056",
                      initialOptions: InAppWebViewGroupOptions(
                        crossPlatform: InAppWebViewOptions(
                          mediaPlaybackRequiresUserGesture: false,
                          debuggingEnabled: true,
                        ),
                      ),
                      onWebViewCreated: (InAppWebViewController controller) {
                        _webViewController = controller;
                      },
                      androidOnPermissionRequest: (InAppWebViewController controller, String origin, List<String> resources) async {
                        return PermissionRequestResponse(resources: resources, action: PermissionRequestResponseAction.GRANT);
                      }
                  ),
                ),
              ),
            ]))
    );
  }
}
如你所见,我还使用 path_provider 插件获得保存文件的文件夹。
允许自签名 SSL 证书
要允许自签名 SSL 证书,你可以使用 onReceivedServerTrustAuthRequest 事件,并在简单地返回后继续处理该请求:
onReceivedServerTrustAuthRequest: (controller, challenge) async {
  return ServerTrustAuthResponse(action: ServerTrustAuthResponseAction.PROCEED);
},
如何管理使用 target=”_blank”或“window.open”打开的弹出窗口?
在处理用户点击 target="_blank" 链接或通过 JavaScript 代码 window.open 打开的窗口时 ,可以使用 onCreateWindow 事件。在 Android 上,要启用这个事件,需要将 supportMultipleWindows 选项设置为 true。另外,为了能够使用 JavaScript,你需要将 javaScriptCanOpenWindowsAutomatically 设置为 true 。
如果你想处理这些请求,那么你应该让该事件返回 true ,否则,该事件的默认实现不会做任何事情,并返回 false。
CreateWindowRequest 表示一个导航请求,其中包含一个 windowId ,可以用来创建一个新的 InAppWebView 实例。本地代码使用这个 windowId 来映射请求和 WebView 从而处理该请求。
另外, CreateWindowRequest 包含请求的 url (在 Android 上,如果弹出窗口是用 JavaScript 代码 window.open打开的窗口,那么它会是 null )。但是,如果你需要维护 JavaScript 对象引用 Window (使用 window.open 方法创建),比如调用 window.close 方法,那么你应该使用 windowId 创建新的 WebView,而不是使用该 url 。
下面是一个简单的例子,当用户点击链接时显示一个 AlertDialog 对话框:
import 'dart:async';
import 'package:flutter/material.dart';
import 'package:flutter_inappwebview/flutter_inappwebview.dart';
Future main() async {
  WidgetsFlutterBinding.ensureInitialized();
  runApp(new MyApp());
}
class MyApp extends StatefulWidget {
  @override
  _MyAppState createState() => new _MyAppState();
}
class _MyAppState extends State<MyApp> {
  @override
  Widget build(BuildContext context) {
    return MaterialApp(
        home: InAppWebViewPage()
    );
  }
}
class InAppWebViewPage extends StatefulWidget {
  @override
  _InAppWebViewPageState createState() => new _InAppWebViewPageState();
}
class _InAppWebViewPageState extends State<InAppWebViewPage> {
  InAppWebViewController _webViewController;
  InAppWebViewController _webViewPopupController;
  @override
  void initState() {
    super.initState();
  }
  @override
  void dispose() {
    super.dispose();
  }
  @override
  Widget build(BuildContext context) {
    return MaterialApp(
      home: Scaffold(
        appBar: AppBar(
          title: const Text('InAppWebView Example'),
        ),
        body: SafeArea(
          child: Container(
              child: InAppWebView(
                initialData: InAppWebViewInitialData(
                    data: """
<!DOCTYPE html>
<html lang="en">
<head>
    <meta charset="UTF-8">
    <meta name="viewport" content="width=device-width, user-scalable=no, initial-scale=1.0, maximum-scale=1.0, minimum-scale=1.0">
    <meta http-equiv="X-UA-Compatible" content="ie=edge">
    <title>Flutter InAppWebView</title>
</head>
<body>
  <a style="margin: 50px; background: #333; color: #fff; font-weight: bold; font-size: 20px; padding: 15px; display: block;"
    href="https://github.com/flutter"
    target="_blank">
    Click here to open https://github.com/flutter in a popup!
  </a>
</body>
</html>
"""
                ),
                initialOptions: InAppWebViewGroupOptions(
                    crossPlatform: InAppWebViewOptions(
                      debuggingEnabled: true,
                      // set this to true if you are using window.open to open a new window with JavaScript
                      javaScriptCanOpenWindowsAutomatically: true
                    ),
                    android: AndroidInAppWebViewOptions(
                      // on Android you need to set supportMultipleWindows to true,
                      // otherwise the onCreateWindow event won't be called
                      supportMultipleWindows: true
                    )
                ),
                onWebViewCreated: (InAppWebViewController controller) {
                  _webViewController = controller;
                },
                onCreateWindow: (controller, createWindowRequest) async {
                  print("onCreateWindow");
                  showDialog(
                    context: context,
                    builder: (context) {
                      return AlertDialog(
                        content: Container(
                          width: MediaQuery.of(context).size.width,
                          height: 400,
                          child: InAppWebView(
                            // Setting the windowId property is important here!
                            windowId: createWindowRequest.windowId,
                            initialOptions: InAppWebViewGroupOptions(
                                crossPlatform: InAppWebViewOptions(
                                    debuggingEnabled: true,
                                ),
                            ),
                            onWebViewCreated: (InAppWebViewController controller) {
                              _webViewPopupController = controller;
                            },
                            onLoadStart: (InAppWebViewController controller, String url) {
                              print("onLoadStart popup $url");
                            },
                            onLoadStop: (InAppWebViewController controller, String url) {
                              print("onLoadStop popup $url");
                            },
                          ),
                        ),
                      );
                    },
                  );
                  return true;
                },
              ),
            ),
          ),
      ),
    );
  }
}
onCreateWindow 事件弹出窗口示例
处理 whatsapp:、fb:、tel:、mailto: 等平台 URL
一般来说,WebView 不知道如何处理 whatsapp: 、 tel: 或 fb: 协议 / 方案。要捕获使用这些自定义协议 / 方案发出的请求,可以使用 shouldOverrideUrlLoading 事件(需要通过 useShouldOverrideUrlLoading: true 选项启用它)。
这样你就可以取消对 WebView 的请求,取而代之打开 App,比如说使用 url_launcher 插件:
initialOptions: InAppWebViewGroupOptions(
  crossPlatform: InAppWebViewOptions(
      debuggingEnabled: true,
      useShouldOverrideUrlLoading: true
  ),
),
shouldOverrideUrlLoading: (controller, request) async {
  var url = request.url;
  var uri = Uri.parse(url);
  if (!["http", "https", "file",
    "chrome", "data", "javascript",
    "about"].contains(uri.scheme)) {
    if (await canLaunch(url)) {
      // Launch the App
      await launch(
        url,
      );
      // and cancel the request
      return ShouldOverrideUrlLoadingAction.CANCEL;
    }
  }
  return ShouldOverrideUrlLoadingAction.ALLOW;
},
处理 WebView Cookies
要处理 WebView 的 cookie,可以使用 CookieManager 类,它实现了一个单例对象(共享实例)。在 Android 上,它是使用 CookieManager 类实现的。在 iOS 上,它则是使用了 WKHTTPCookieStore 类。
下面是一个如何设置 cookie 的例子:
CookieManager _cookieManager = CookieManager.instance();
final expiresDate =
    DateTime.now().add(Duration(days: 3)).millisecondsSinceEpoch;_cookieManager.setCookie(
  url: "https://flutter.dev/",
  name: "session",
  value: "54th5hfdcfg34",
  domain: ".flutter.dev",
  expiresDate: expiresDate,
  isSecure: true,
);
自定义快捷菜单
你可以自定义 WebView 的快捷菜单,添加自定义菜单项,和 / 或隐藏默认的系统菜单项。对于每个自定义菜单项,你可以声明一个回调 action ,当用户单击时调用它。作为示例,我将添加一个名为 Special 的自定义菜单项,并定义一个回调动作,使用选中的文本向用户显示 JavaScript window.alert 。
自定义菜单项示例
下面是完整的代码:
import 'dart:async';
import 'dart:io';
import 'package:flutter/material.dart';
import 'package:flutter_inappwebview/flutter_inappwebview.dart';
Future main() async {
  WidgetsFlutterBinding.ensureInitialized();
  runApp(MyApp());
}
class MyApp extends StatefulWidget {
  @override
  _MyAppState createState() => new _MyAppState();
}
class _MyAppState extends State<MyApp> {
  @override
  Widget build(BuildContext context) {
    return MaterialApp(
        home: InAppWebViewPage()
    );
  }
}
class InAppWebViewPage extends StatefulWidget {
  @override
  _InAppWebViewPageState createState() => new _InAppWebViewPageState();
}
class _InAppWebViewPageState extends State<InAppWebViewPage> {
  InAppWebViewController _webViewController;
  ContextMenu contextMenu;
  @override
  void initState() {
    super.initState();
    contextMenu = ContextMenu(
        menuItems: [
          ContextMenuItem(androidId: 1, iosId: "1", title: "Special", action: () async {
            print("Menu item Special clicked!");
            var selectedText = await _webViewController.getSelectedText();
            await _webViewController.clearFocus();
            await _webViewController.evaluateJavascript(source: "window.alert('You have selected: $selectedText')");
          })
        ],
        options: ContextMenuOptions(
            hideDefaultSystemContextMenuItems: false
        ),
        onCreateContextMenu: (hitTestResult) async {
          print("onCreateContextMenu");
          print(hitTestResult.extra);
          print(await _webViewController.getSelectedText());
        },
        onHideContextMenu: () {
          print("onHideContextMenu");
        },
        onContextMenuActionItemClicked: (contextMenuItemClicked) async {
          var id = (Platform.isAndroid) ? contextMenuItemClicked.androidId : contextMenuItemClicked.iosId;
          print("onContextMenuActionItemClicked: " + id.toString() + " " + contextMenuItemClicked.title);
        }
    );
  }
  @override
  Widget build(BuildContext context) {
    return Scaffold(
        appBar: AppBar(
            title: Text("InAppWebView")
        ),
        body: Container(
            child: Column(children: <Widget>[
              Expanded(
                child: Container(
                  child: InAppWebView(
                      initialUrl: "https://github.com/flutter",
                      contextMenu: contextMenu,
                      initialOptions: InAppWebViewGroupOptions(
                        crossPlatform: InAppWebViewOptions(
                          debuggingEnabled: true,
                        ),
                      ),
                      onWebViewCreated: (InAppWebViewController controller) {
                        _webViewController = controller;
                      },
                  ),
                ),
              ),
            ]))
    );
  }
}
总结
在本文中,我简单介绍了 flutter_inappwebview 插件,特别是 InAppWebView 小部件。该插件正在持续开发中(在撰写本文时,其最新版本是 4.0.0 )。如果想要了解它所有的特性,我建议查看 API 参考文档。如果有任何新的特性请求 /bug 修复,则可以使用存储库的 Issue 部分。
下一篇文章将介绍如何使用这个插件实现一个功能齐全的浏览器。今天就到这里!我希望它为你的 Flutter 应用开辟了新的用例。欢迎关注 Flutter 社区 Twitter 。
原文链接: